Building a Quiet Server Rack in My Bedroom (and Why My Partner Wasn't Happy)
My journey into homelab nirvana took an unexpected turn when I decided my bedroom was the perfect spot for a server rack. What started as a dream quickly became a noisy, warm reality that tested both my technical skills and my partner's patience. This post dives into the challenges of noise reduc...
My Bedroom Homelab Dream (and the Reality Check)
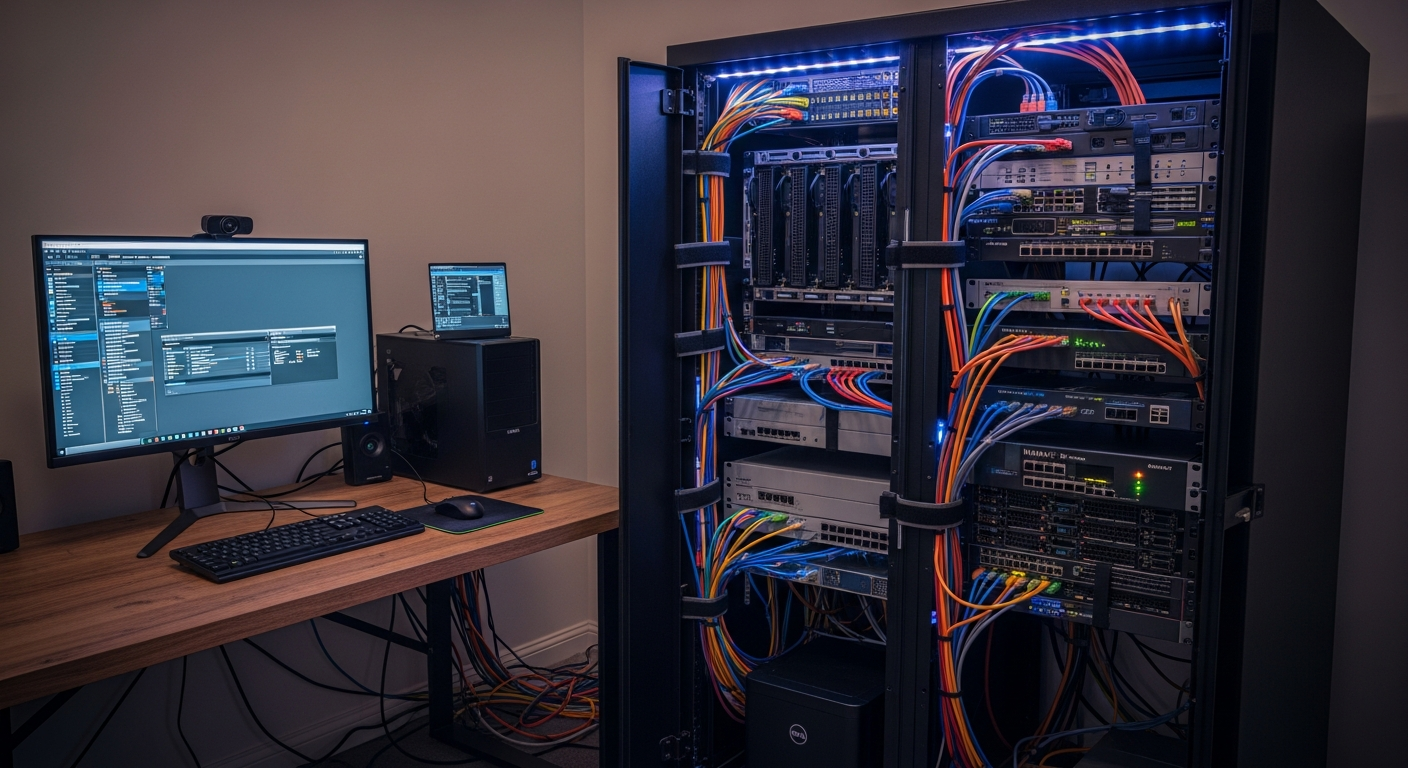
Hey fellow tech enthusiasts! Ever had one of those brilliant ideas that seemed perfect on paper, only to realize the real-world implications were... less than ideal? That was me, about a year ago, when I decided my burgeoning homelab needed a proper home. And where better, I thought, than a sleek, wall-mounted server rack right in my bedroom? After all, it was unused wall space, and I'd be close to my gear for late-night tinkering.
The vision was clear: a compact, powerful, and *silent* rack hosting my NAS, a virtualization server, and a few networking bits. The reality? A symphony of fan hums, HDD chirps, and the gentle, persistent glow of status LEDs that turned my peaceful sanctuary into a miniature data center. My partner, bless her patience, was not amused. "It sounds like a tiny jet engine is taking off next to my head," she'd say, usually around 2 AM. Point taken.
The Struggle: Noise, Heat, and a Disgruntled Partner
The initial setup was a standard 6U wall-mount rack. Inside, I had an old enterprise-grade server (my first mistake, those things are *loud*), a consumer-grade NAS, and a managed switch. The combined effect was an ambient noise level that made it difficult to sleep, let alone relax. Add to that the subtle but noticeable temperature increase in the room, and I knew I had a serious problem on my hands.
My partner's unhappiness wasn't just a personal issue; it became my primary motivator for a complete technical overhaul. The challenge was clear: achieve near-silent operation and manage heat, all within a small, enclosed space, without sacrificing performance too much. This wasn't just about 'quiet enough'; it had to be *truly* quiet.
The Technical Deep Dive: Achieving Silence and Coolness
1. Tackling the Noise Demons:
• Component Selection is Key: My first realization was that enterprise gear, while powerful, is designed for server rooms, not bedrooms. I swapped out the noisy enterprise server for a custom-built mini-ITX system with a low-power CPU (an Intel 'T' series) and an efficient, fanless power supply.
• Fan Replacement & Control: This was a game-changer. Every single fan – from the case fans to the switch fans (yes, I modded a managed switch!) – was replaced with ultra-quiet Noctua or be quiet! fans. Crucially, I implemented a fan controller (a simple Arduino-based solution with temperature sensors) to dynamically adjust fan speeds. They only spun up when absolutely necessary, and even then, they were barely audible.
• Storage Solutions: HDDs are inherently noisy. I migrated all critical OS and VM storage to SSDs. For bulk data, I moved my NAS drives into an external, sound-dampened enclosure located in a closet, connecting it back via a long Ethernet cable.
• Acoustic Enclosure: While I couldn't get a full soundproof rack, I lined the inside of my existing wall-mount rack with acoustic foam panels. This made a noticeable difference in absorbing internal fan and component noise.
2. Conquering the Heat:
• Airflow Management: Sound dampening can restrict airflow, so I had to be smart. I designed a clear intake/exhaust path within the rack, ensuring cool air entered from the bottom and warm air exited from the top, assisted by those quiet, controlled fans.
• Low-Power Components: This was critical. Choosing CPUs with lower TDP (Thermal Design Power) meant less heat generated in the first place. I also opted for network gear that was known for lower power consumption.
• Cable Management: Surprisingly, tidying up cables dramatically improved internal airflow, preventing hot spots and allowing fans to work more efficiently at lower RPMs.
3. The 'Partner-Approved' Aesthetics:
Beyond noise and heat, the blinking lights were another point of contention. A simple solution: I used electrical tape to cover any excessively bright status LEDs on the network switch and server. Out of sight, out of mind (and out of sleep disturbance!).
Lessons Learned and the Road to Success
This whole experience was a masterclass in compromise and meticulous planning. Here's what I took away:
• Don't Underestimate Noise: What seems like a minor hum during the day becomes a roaring beast at night. Prioritize noise reduction from the start, not as an afterthought.
• Every Component Matters: From PSUs to tiny chipset fans, every part contributes to the overall acoustic profile and thermal load. Research component noise levels thoroughly.
• Active Cooling Doesn't Mean Loud: With the right fans and intelligent control, active cooling can be incredibly effective and quiet.
• The WAF (Wife Acceptance Factor) is Real: Or in my case, Partner Acceptance Factor. Designing a homelab that integrates seamlessly into a shared living space is just as important as its technical capabilities.
Today, my bedroom server rack is a testament to perseverance. It's truly quiet – you have to actively listen to hear it – and the room temperature remains stable. My partner is happy, I'm happy, and my homelab continues to hum along, albeit now in a gentle whisper. It was a struggle, but overcoming these challenges taught me invaluable lessons about system design, acoustics, and the art of peaceful cohabitation with technology.
Have you tackled a similar challenge? Share your tips and tricks in the comments below!